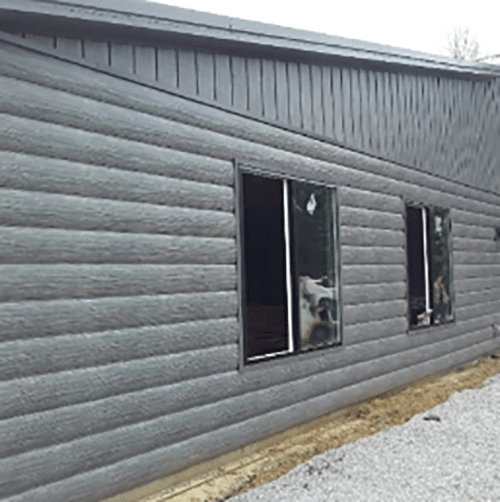
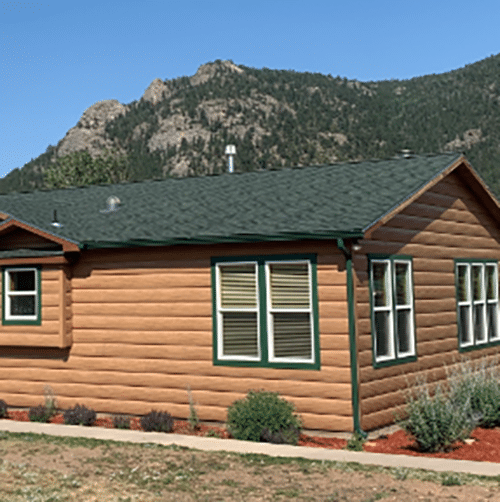
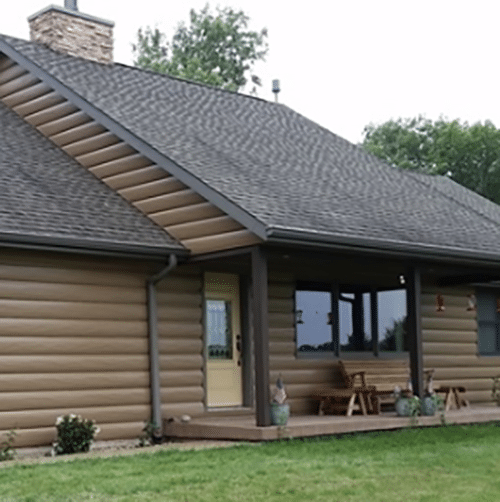
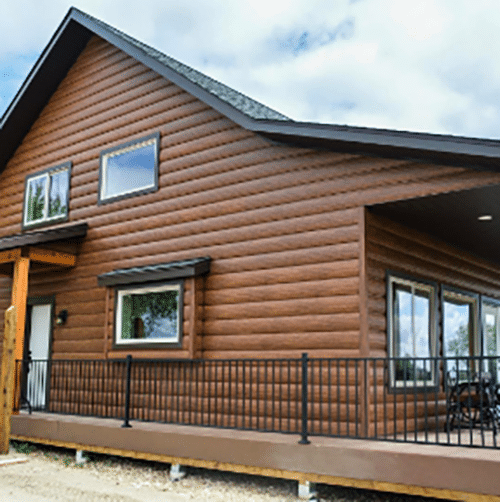
Log lap siding is easy to install — as long as you’re equipped with the best products. Traditional wood log lap siding can take ages to prep, install, and finish, but log lap siding made from steel can be installed quickly and effortlessly.
Instead of worrying about your carpentry skills, consider a material that’s easier to work with for a smooth, worry-free finish.
Not sure where to start when it comes to installing log siding shiplap or log round polymer lap siding? One of the best parts about TruLog’s steel log siding products is that there are an abundance of authentic-looking designs to choose from, yet the installation process remains simple and straightforward. This is all due to the innovative shape that makes securing the lap panels easy.
Smart designs and quality products don’t have to be overcomplicated by a confusing installation process. Follow this step-by-step breakdown of how to install log lap siding made from steel, and you’ll see just how easy the technique is to master.
Step 1 – Starter Strip
The first step toward beautiful lap log siding requires securing the starter strip. The starter strip should be set ½-inch to 1-inch above the foundation. Measure the length of the strip at both the base, and the top near the soffit, by snapping a chalk line. This can help ensure the starter strip stays level from one corner of the home to the other. Once the starter strip is lined up and level, secure it with 1-inch to 1 ½-inch screws.
Step 2 – Corner Base
Next, measure and cut the corner base to the height of the wall. Be sure to include the full length – from the soffit down to the bottom of the starter strip. Like the starter strip, the corner base can be secured to the wall using 1-inch to 1 ½-inch screws. The corner base is a very important piece, because it acts as a cap for the siding that will be installed later. It creates a smooth and finished look to the log lap siding.
Step 3 – Adding the J-Channel Around Doors and Windows
Before you begin installing the lap log siding panels, be sure you’ve installed adequate J-channel pieces along all doors and windows. Do this by measuring the side of the door or window and adding ½-inch, which is enough extra length to allow for clean intersections between J-channels. Once all window and door borders are set with J-channels, you’re ready to start with the largest part of the project: adding the steel lap log siding panels along the exterior walls.
Step 4 – Add the Steel Lap Log Siding, Continue Upwards
Here’s where the magic happens when working with TruLog lap log siding made from steel. Each panel is constructed with a bottom lock, top lock, and built-in nail strip. This simplifies the entire installation process by allowing builders to quickly slide the panels into place and know when they’re perfectly lined up. Unlike natural wooden log lap siding, steel siding panels are always uniform, meaning the pieces snap together with ease. TruLog steel lap siding comes in 12-foot lengths, and approximately 11 panels are needed to cover 100 square feet of exterior walls.
Remove the foam backer from each panel as you line it up. Slide the bottom lock into the starter strip and apply gentle pressure upwards on the panel to lock it in place. Secure the panel to the wall on one end, and then carefully drop the foam backer into place on the other end. Once the foam backer is slid into place, you can work your way down the panel, using either screws or nails secured to studs. Continue to work your way from the bottom up.
Step 5 – Maneuvering Around Obstacles
As you reach light boxes, outlets, and other obstacles, you’ll need to measure precisely and cut the siding accordingly. Steel lap siding is easy to cut with aviation snips, which allow you to work around obstacles without wasting materials, or time. In addition, the J-channels surrounding the windows and doors work similar to the starter strip — simply snap the siding into place and secure it.
Step 6 – Placing the Last Piece Before Soffit
As you continue to work your way along the exterior walls, the beauty of the steel lap log siding will begin to take shape! In most cases, the last piece of paneling will need to be cut down a bit to end flush with the soffit.
Before you place the last piece, measure from the soffit down to the nail strip of the final piece, subtract just a little, and cut your piece of steel log lap siding. Cutting the piece just a pinch shorter will help you lock it into place with the existing siding. Be sure to cut the foam backer, as well! Since the nail strip will no longer be present after cutting the final piece to size, face nail along the top edge in order to secure the last panel.
A slight gap left between the final piece and the soffit is not a problem — this part is designed to be covered by a finished piece that snaps into the soffit, to create a seamless look.
TruLog Lap Siding Installation Is Designed to Be Easy
There are so many aspects of the TruLog steel lap siding panels that provide for an easy, worry-free installation. From the built-in nail strip to the bottom and top lock design, steel siding is a great way to get the authentic look of log siding without all the complex installation hangups.
Download our Lap Siding Buyers Guide Today for more tips on lap log siding installation and to browse all the beautiful wood-style siding products available.