DIY pole barns are extremely popular because almost anyone with a bit of construction experience can undertake the project without specialized equipment or large labor teams. In fact, the building process is fairly straightforward for DIY pole barns.
With that said, there are a lot of tips and tricks that can help build the best DIY pole barn. Advanced planning and careful forethought are key when building a DIY pole barn, so it’s worth it to plan out each step of the process ahead of time.
Building a DIY pole barn can be an excellent hands-on project that gives homeowners a way to make practical improvements to their property. Whether it’s your first building project or you’re simply looking for a way to improve your project plans, check out this step-by-step guide on how to build a DIY pole barn:

1. Clear and Level the Build Site
Clearing the build site is an essential first step in this project. Sometimes a site may look ideal at the start, but once you unearth a few red flags, like rocky and unstable ground, plans for the location of your DIY pole barn may need to be modified. Also, it’s important to clear and level a larger area than the DIY pole barn will occupy. This gives you a bit of leeway during the construction process in case dimensions of the structure change or the layout is altered. Use stakes and string to measure the precise dimensions of your DIY pole barn on the leveled site, and keep these markers in place while setting the poles.
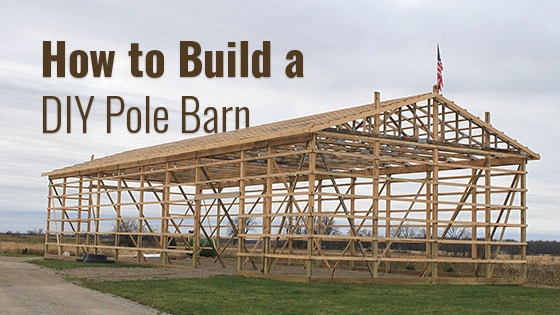
2. Set Poles
Setting the poles is by far one of the most important steps of building a sturdy DIY pole barn. Take your time during this step to execute precise measurements, and keep your level handy to ensure that the poles are set upright. Also, the poles should be anchored at an appropriate depth after a narrow hole is dug. Digging anchor holes may be tedious, but taking a shortcut on this step can lead to disaster down the line.
3. Framing
Framing consists of installing horizontal timbers to connect and stabilize the set poles. For small DIY pole barns, 2” by 8” lumber is sufficient for the top frame where the trusses will sit. However, larger barns may require longer beams for the framing. For low beams that make contact with the ground, consider using treated timber to help prevent wood rot, which can completely destabilize a barn.
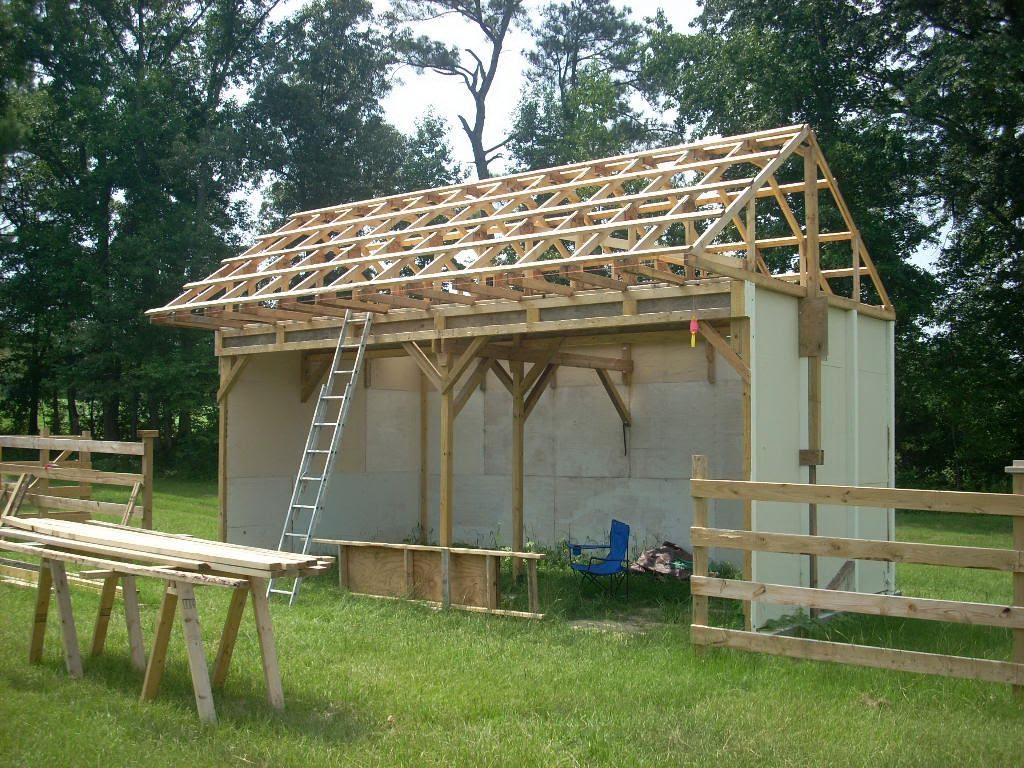
4. Trusses
Once the frame is securely installed, it’s time to add trusses to the top. Be sure to use heavy-duty screws and add metal runners where necessary to stabilize the trusses. A gambrel roof or saltbox design may add great character to your DIY pole barn, but an easy open gable is best for beginners looking for a basic build.
5. Flooring
As with trusses, there are many options available for flooring. Gravel or dirt may suffice if the pole barn will be used for equipment storage. For barns that will keep livestock, sawdust flooring is the best to help manage moisture. Finally, pouring a concrete floor may be the most labor intensive of all the options, but it’s probably necessary for DIY pole barns that will be used as workshops or will feature small lounges or living quarters.
6. Insulation
Likewise, if you or any livestock will be spending a significant amount of time in the barn, it’s best to have the structure insulated to maintain a comfortable indoor temperature. Always decide on insulation before installing the exterior.
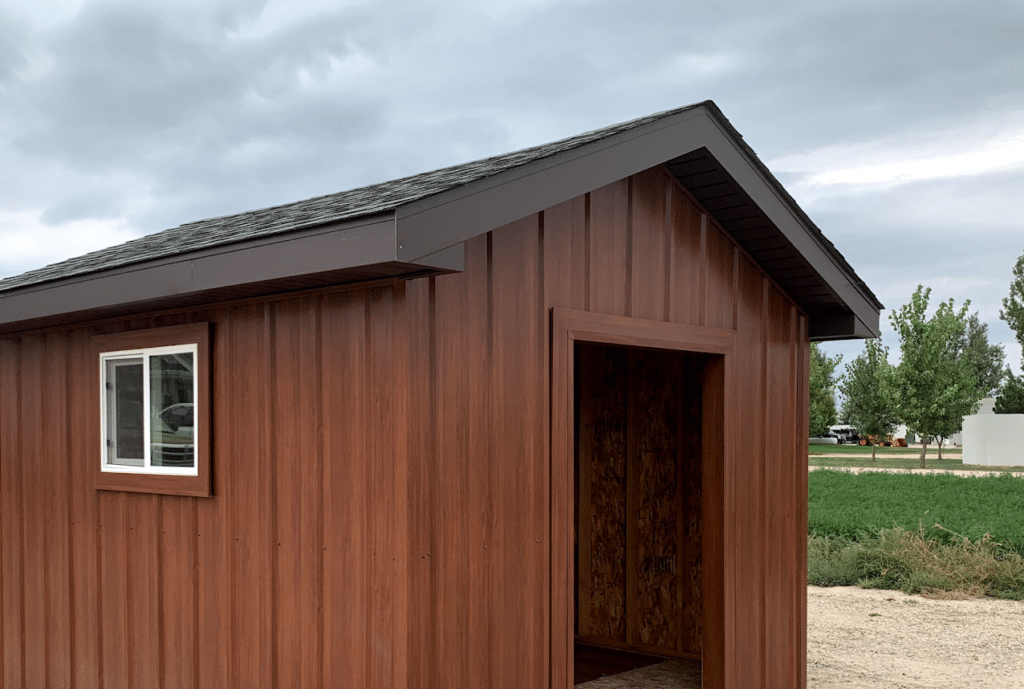
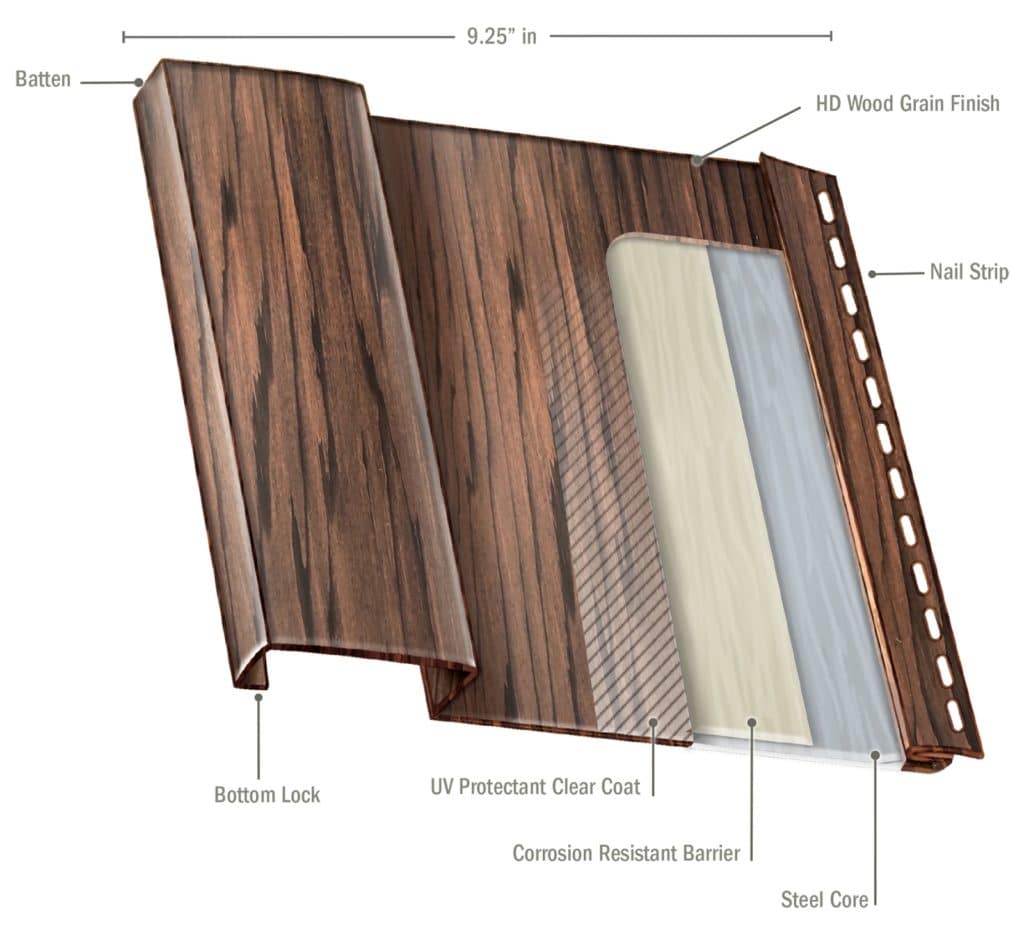
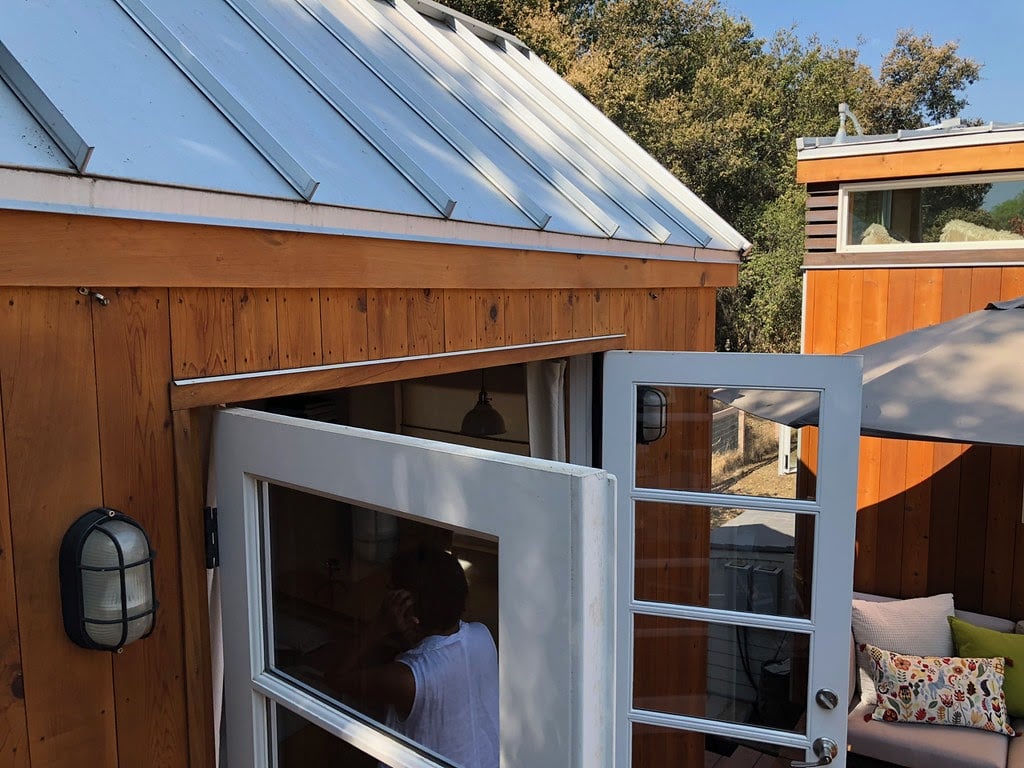
7. Siding
Metal and wood are traditional siding materials for most DIY pole barns. The good news is that siding products have come a long way — both stylistically and structurally — in recent decades, so it’s easy to craft a DIY pole barn that looks great and meshes with the rest of the home. TruLog is a fantastic resource to consult for heavy-duty steel siding that adds excellent protection for DIY pole barns. TruLog even has log-style steel siding, which offers the idyllic look of real wood with the enhanced protection of steel. If there’s one takeaway from this article, it’s to invest in high-quality siding, like TruLog, which will keep your DIY pole barn looking and performing its best with minimal maintenance. Plus, TruLog siding is easy to install, so it’s a great choice for DIY projects.
8. Windows and Doors
Windows and doors should also be thought through carefully. If the pole barn will be getting everyday usage, consider which side provides the most convenient access and how wide the entryway will need to be to accommodate equipment, vehicles, animals, etc. Adding windows can provide natural light and cut down on the need for electricity.
9. Roofing
Finally, add your roofing materials. Just like with siding, roofing is an area that you don’t want to compromise on. Investing in durable, dependable roofing can help your DIY pole barn last much longer and will keep property on the inside protected.
Get Started on Your Pole Barn
Building a DIY pole barn is a great project for homeowners looking to enhance their property. Be sure to follow these steps when building your next DIY pole barn! Contact the wood-look siding experts at Trulog today for more information on durable pole barn siding.